Posts

Send a notification on Microsoft Teams when a record is created or Updated or Deleted in D365 CRM using Power Automate

Image
Steps involved in Power Automate: Select trigger, in my case I used CDS connector (Current Environment) when a record is created, updated or deleted. Select trigger condition, in my case I used Update. Select entity name, in my case I used Opportunities. Select Scope, Organization. Add new step to flow. Search Microsoft Teams and select Post a message. Select Team where you want to post a message. Select Channel from team where you want to send a notification. Enter Message in message box. Click Save and check teams. Congratulations! You have successfully created the required flow Hope this helps!!!

Trigger an Email when account is created in D365 CRM using Azure Logic App

Image
Click here to see, how to create Azure Logic App Search for common data service and select trigger as When a record is created . Select Environment, Entity Name, Scope. Click on new step. Search office 365 outlook and click on Send an email . Now, fill in the required data. Once, all the details are filled in send email connector as shown above, click save. Now, create a new account record in D365 CRM. In my case, I created account with name Tejesh Enterprise . An email will be triggered to the person with the details specified in connector. Hope this Helps!

Create Azure Logic Apps

Image
Create Azure Logic Apps Login to https://portal.azure.com/ Search for logic app in search bar in top header. Click on Add. After clicking on Add, a new form opens. Select Subscription, here I selected Pay-As-You-Go. Select Resource group, here I created new Resource group with name AzureLogicAppLearning. Enter Logic App name in my case it is SendEmailOnAccountCreation. Select the location, here I selected Southeast Asia. Now, click Review + Create. After, clicking Create Deployment of app starts. Post deployment completion you will be redirected to App overview page. Congratulations!! You have successfully created Logic Apps and you can start using connectors.

Connect D365 CRM CDS Database From SQL Server

Image
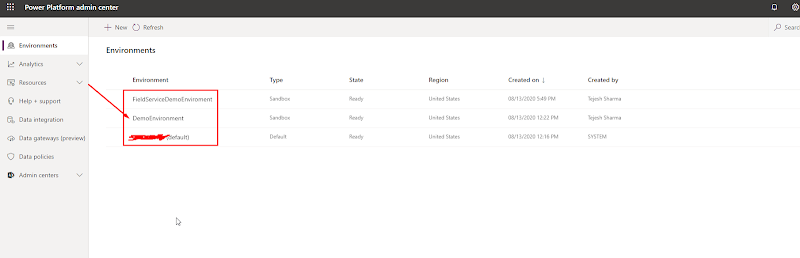
Connect D365 CRM CDS Database from SQL Server Many times, we feel like why I can’t access D365 CRM Database directly from MS SQL Server, so here is my blog that will guide you on how you can connect D365 CRM CDS Database using MS SQL Server. Steps to enable D365 CRM CDS Database to make it connect from MS SQL Server: Login to https://admin.powerplatform.microsoft.com/ using administrator credentials. In Environment section, click on your environment for which you want to enable D365 CRM CDS for MS SQL Server. (In my case I am clicking on DemoEnvironment as shown below.) When Environment opens click on settings in header. Settings page will open, Click on Product and then click on Features. When features Page opens enable TDS Endpoint (Preview) and click save. Now, we have successfully enabled D365 CRM CDS to connect it from MS SQL Server. Steps to Connect CDS Database from MS SQL Server: Open MS SQL Server. In connect to SQL Server Window enter Server name (It will be your D365 CRM UR...

Register Web Hook on Dynamics 365 CRM Entity

Image
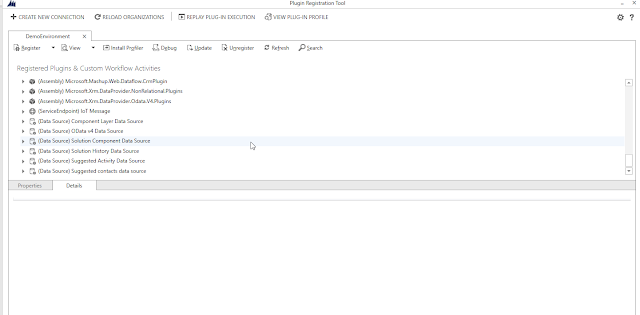
 Register Web Hook on Dynamics 365 CRM Entity Many times we get requirement to integrate 3 rd party application with dynamics 365 CRM and we write a plugin that calls Azure Function or Web API who actually Performs operation of Get or Post data from or To 3 rd Party Application, but we can avoid writing plugin by directly calling Azure Function or web API using Web Hook through Plugin registration tool. This blog will guide you on how to register a Web Hook on D365 CRM Entity. Steps to Register Web Hook:       1.    Open plugin registration tool and connect to your organization where you want to register Web Hook.         2.  After successful connection to organization you will see below screen. 3.   Click on register and select Register New Web Hook.        4.  After clicking on Register New Web Hook, you will be prompted to enter “ Name ”, “ End Point URL ”, “ Authentication ”, “ Key Values ” Fill i...

D365 CRM Business card scan

Image
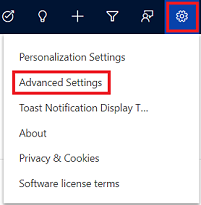
D365 CRM Business card scan To edit the mappings of Business card scanner control, refer below steps. 1. Select the Settings icon, and then select Advanced Settings. 2. The Business Management page opens. 3. On the navigation bar, select Settings, and then under Customization, select Customization. 4. Select Customize the System. 5. Under Components in the solution explorer, expand Entities, and then expand the Contact or Lead 6.  Select Forms. 7. Open the form of type Quick Create. 8. Locate and select the Business Card field on the form, and select Change Properties in the Edit 9.In the Field Properties dialog box, select AI Builder Business Card control on the Control 10.Select the property that you want to change the mapping for, and select the Edit...